Making art in the time of covid
Due to the Coronavirus life has changed drastically, in particular, at school. This means that photography has become very restricted. Frustratingly, we have very little space and few resources. We have had to compromise. This could seem very negative. But, as we think more deeply, we can find ways to be more creative.
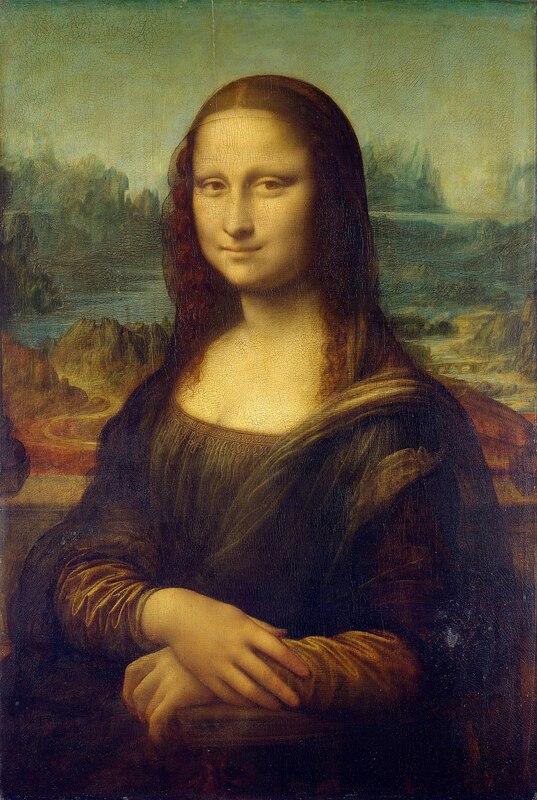
Marcel DuchamP & The REadymadeThe Mona Lisa is so famous due to it getting stolen by Vincenzo Peruggia, as well as that the Mona Lisa is so famous due to her smile. Da Vinci created an optical illusion using unique shadow work.
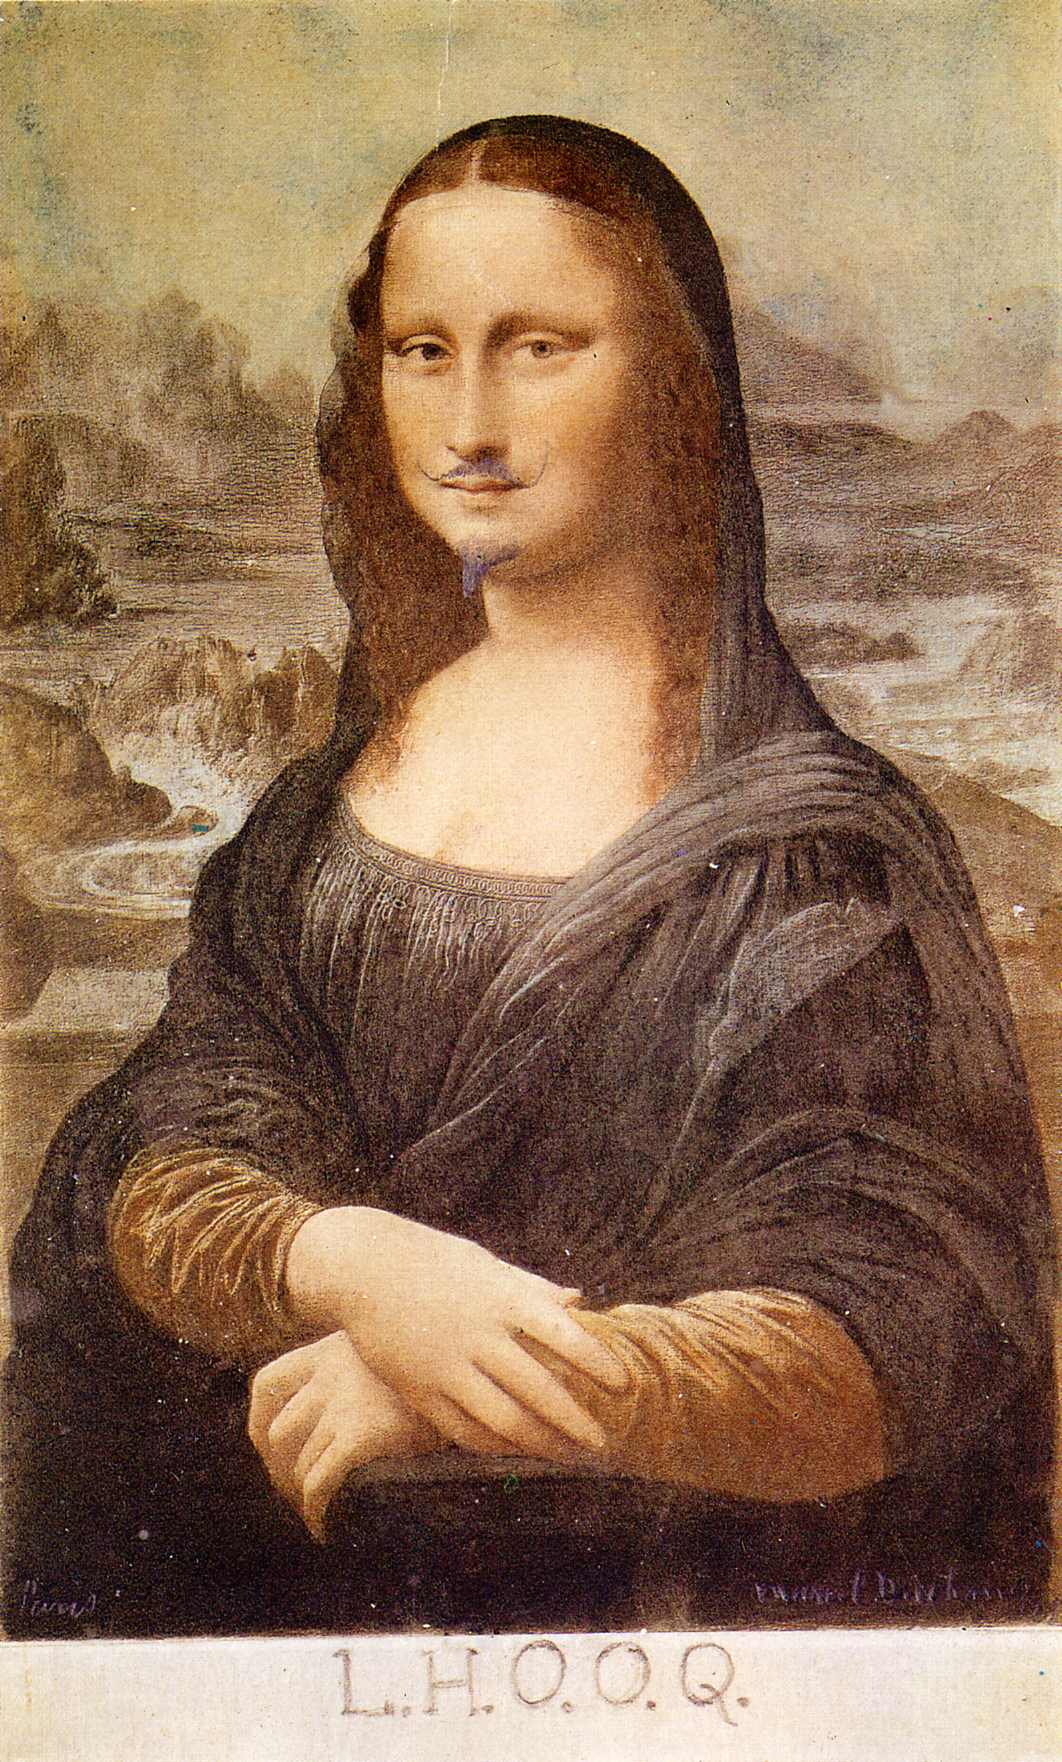
Duchamp may have added facial hair to possible mock the Mona Lisa in some way playing around with sexuality. Ready-made means already created and put together, this recreation of the Mona Lisa could be seen as ready-made because she was already a thing and someone changed an already completed piece of art. It gave people a brand new idea of art, it opened so many new and old artists minds. |
|
|
My Readymades


These are my recreations of images that I have cut and organised into more detailed images. As explained I have had very limited space and options around my work space so imagination is very important to achieve full potential with resources I have been given and had access to. I was given old portrait pictures to experiment with, and I made small insertions/cuts into the images and layered other bright coloured images underneath to make the images more visibly pleasing. With some of the images shown higher up I cut out key parts of the image and ever so slightly replaced them in a different place or order.
Hannah Hoch collage analysis
|
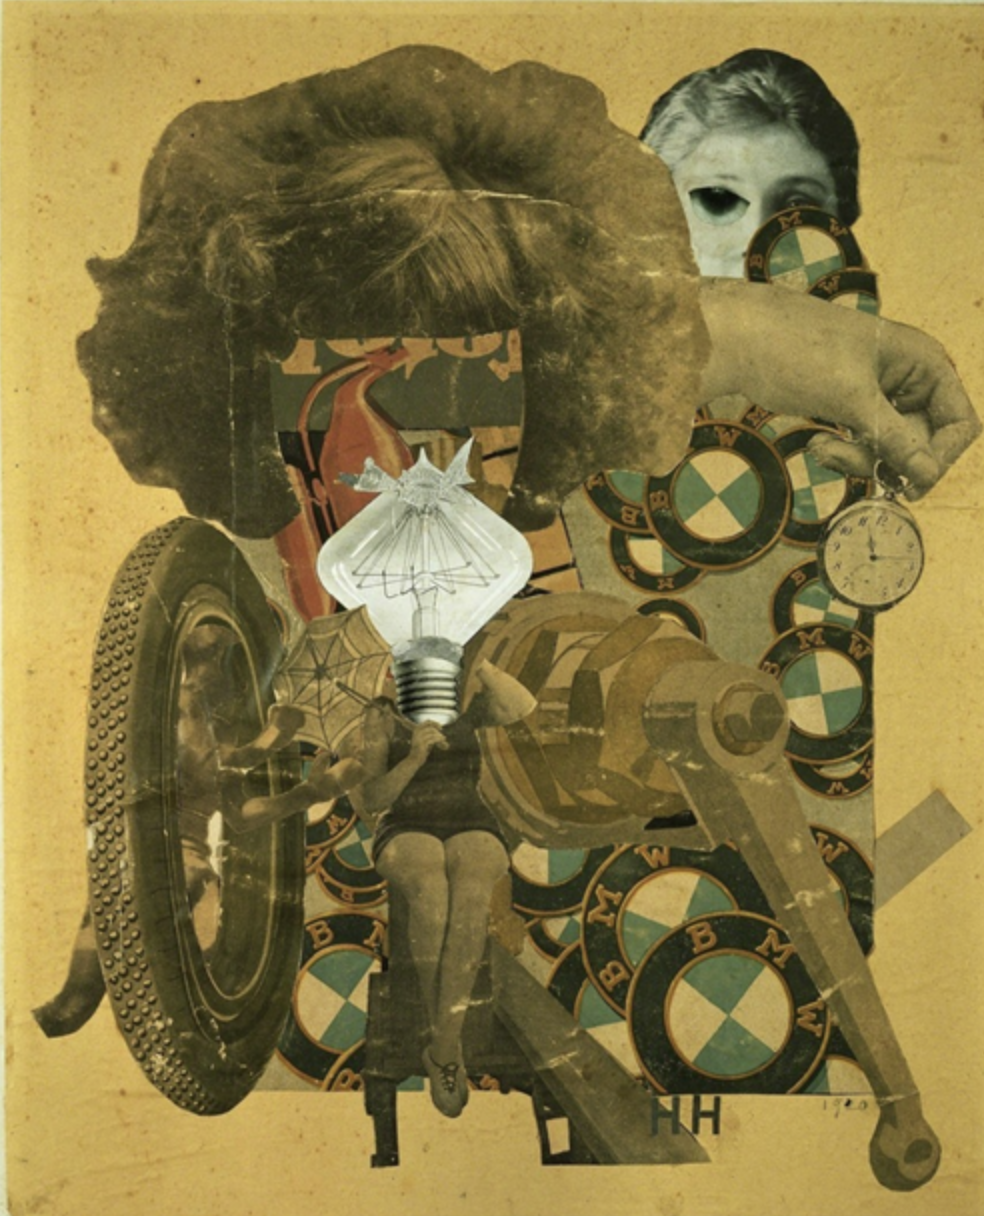
In this picture I can see a mixture of things laid out in a collage format. For example, the first thing that stood out to me was the repeated BMW car logo, as well as the human features such as the legs, hand and face. Also, the hair stood out to me as well. As I looked more, I could see a range of unusual objects that don’t really relate to my initial perceptions.
The most important aspect of the image to me is the light bulb in the middle of the top section of the image. I believe this because after looking at this image for a short while I believe there could be a hidden, abstract meaning behind the light bulb's presence. It could be interpreted from different angles and aspects depending on the viewer. I think that the light bulb has been placed there for different people to interpret different things e.g. ideas that the made-up human parts could represent a human as a whole and the light bulb shows the person’s thoughts. The other aspect of the image are objects such as mechanical tools, an individual car logo repeated and a clock, which could represent time or history. There are several car parts. For example, I can see a wheel of some sort. This picture was created in 1920. At the time the different aspects of the image could have been seen to represent stereotypical male and female interests. The more hands-on things, such as the car parts and the car logo, could have represented men without showing a male figure. This also links to the idea of abstraction and a deeper meaning to the image than what first meets the eye. |
I believe that the image has the title of ‘Beautiful girl’ because the two separate very different things shown in the image could show off the idea of equality during the war. For example, when the men were sent off to fight in the First World War the women were left to fend for themselves covering jobs and roles that the men were now no longer able to fill. The image could show the idea of women's power and control. On the other hand, this image could be representing the broken society of Germany after the war because of the disorganised, messy composition and the links to German industry. If I was going to rename this image, I would possibly call it something along the lines of ‘Broken Society’ or even just ‘Broken’ to leave the viewer with a more open mind.
The 3 adjectives I have chosen to describe this image are faulty, ruptured and damaged. I think these adjectives best describe how I have interpreted the image.
The 3 adjectives I have chosen to describe this image are faulty, ruptured and damaged. I think these adjectives best describe how I have interpreted the image.
making day...


These images are steps and creations of what I have come up with in todays making day.
My initial thoughts about how I wanted my collages to turn out were scrambled, I knew I wanted bright colour to accentuate darker features but I had an open mind to whatever was thrown my way. I found some images in a wide range of photography books that were on the shelf in the classroom and chose out a few of my favourite and ones I knew I could play around with, these are some of the ones I chose:
My initial thoughts about how I wanted my collages to turn out were scrambled, I knew I wanted bright colour to accentuate darker features but I had an open mind to whatever was thrown my way. I found some images in a wide range of photography books that were on the shelf in the classroom and chose out a few of my favourite and ones I knew I could play around with, these are some of the ones I chose:
|
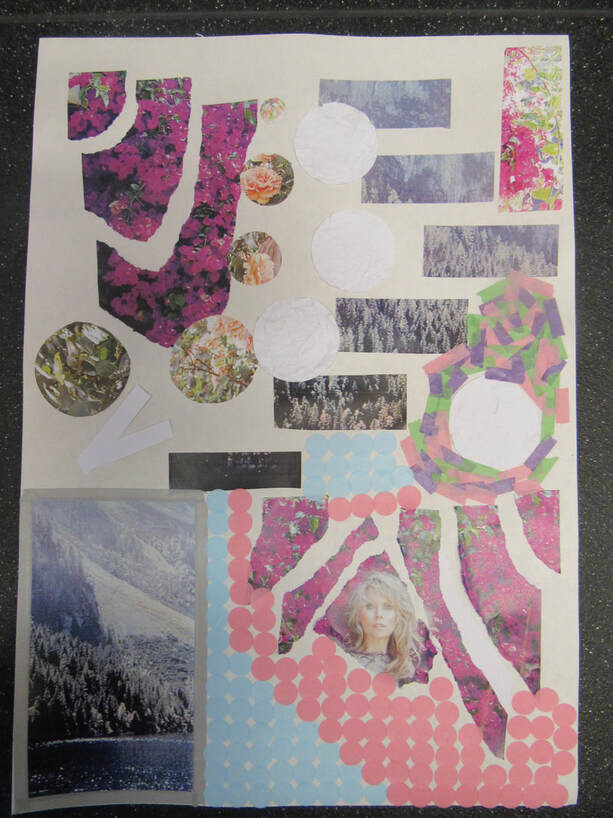
Both of my final products have overwhelming colour and detail. Here they are:
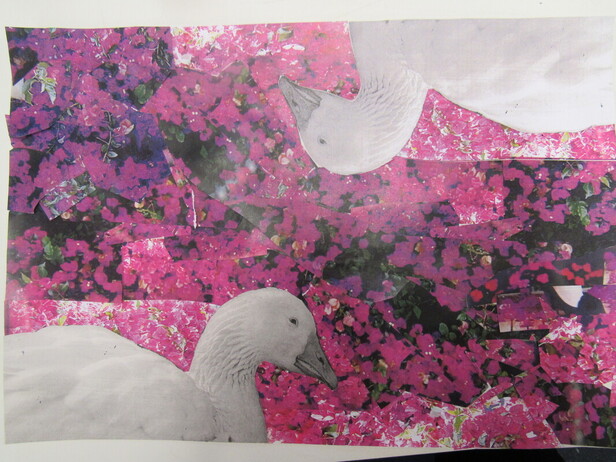
My theme and focus are different in both collages. My focus for the first was detail and contrast of pink and blue\cold and warm\ floral and icy. My main focus for the second once I had finished the first was bright colour in contrast with white which was the focus.
I rearranged the cut outs on my cartridge paper multiple times until I found a way that worked well with me visually. The hardest thing I faced today was making the final outcome the best it could possibly be without overthinking ever step I took. |
PlayGround
plasticine


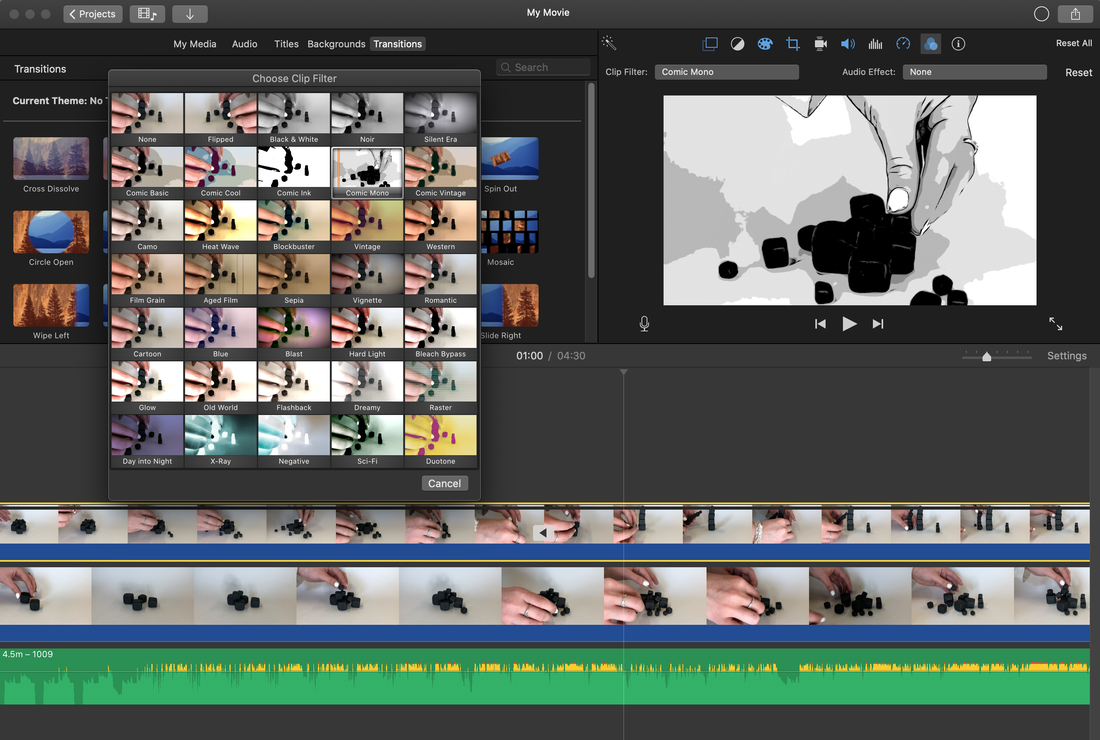
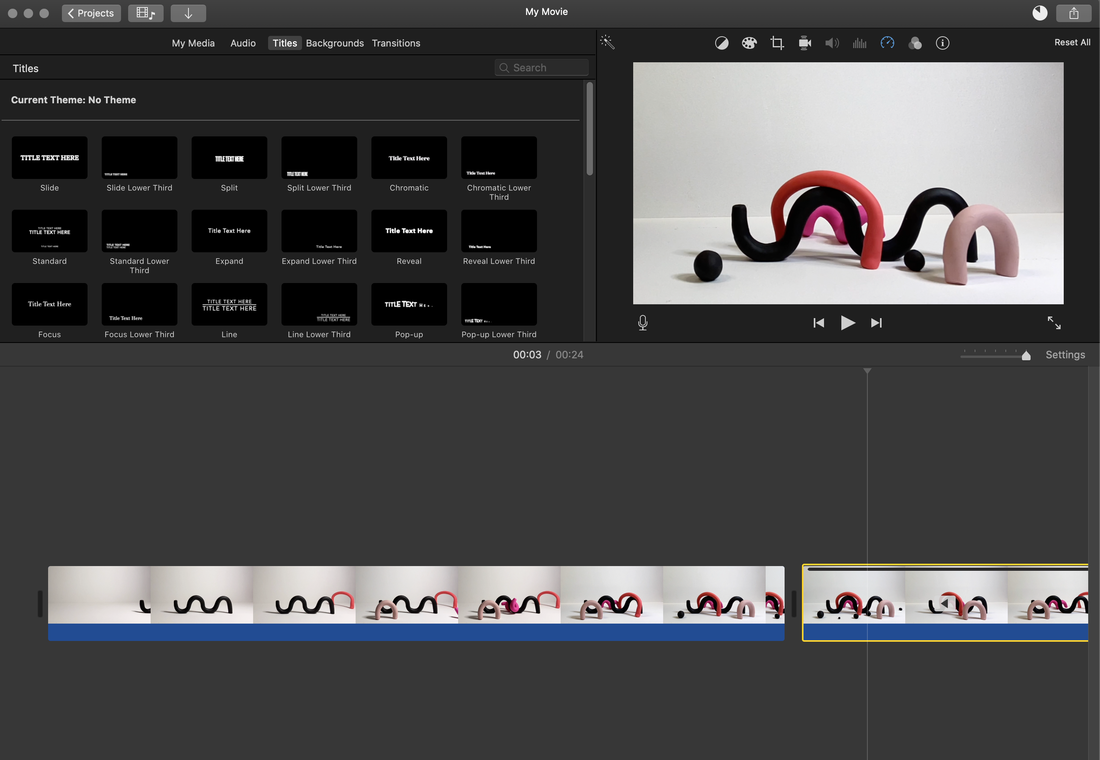
Video editing
Split-screen video
Stop-Motion Animation


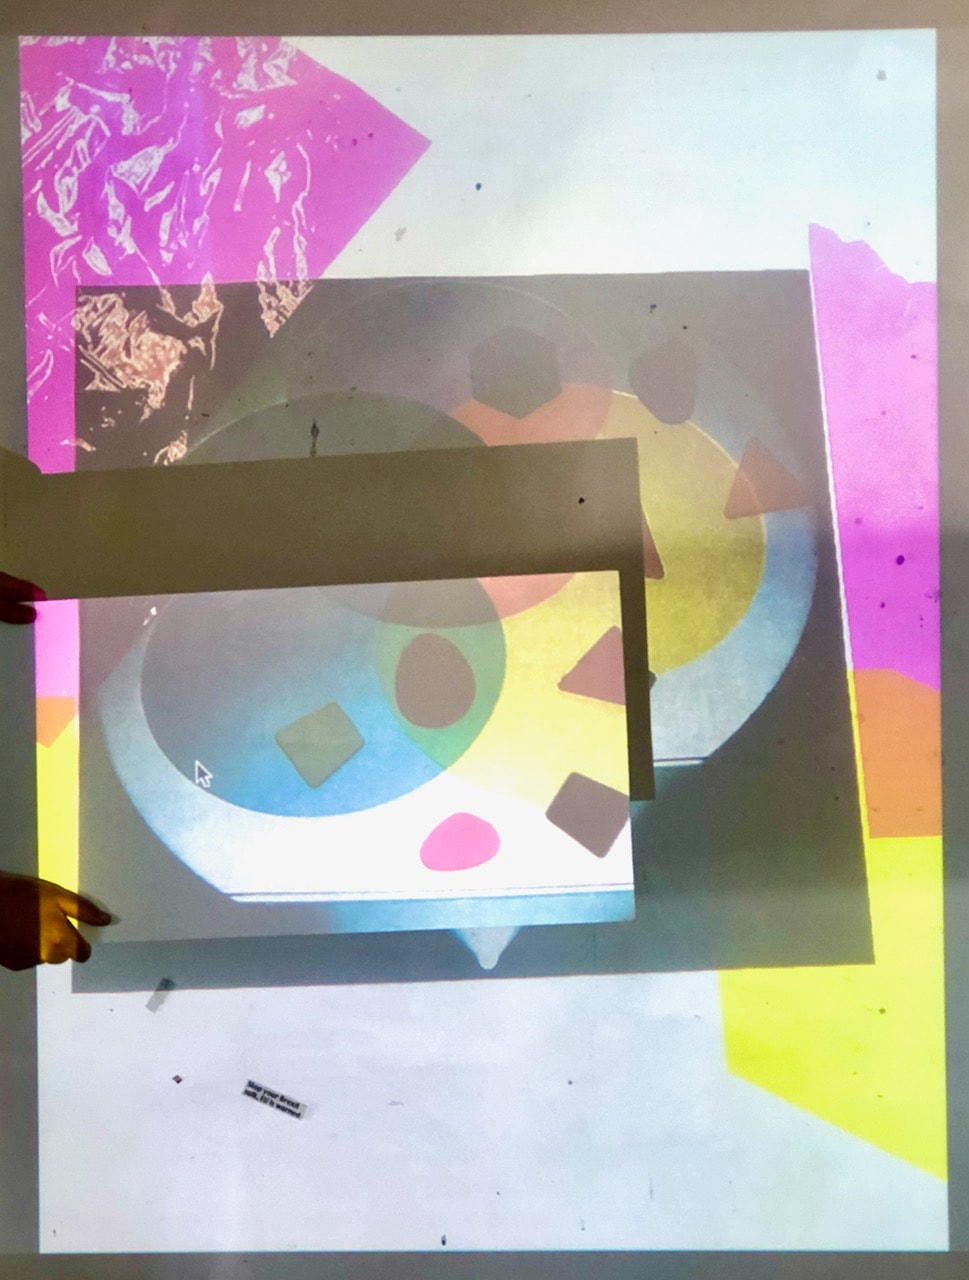
Transparencies & Projections


Edited images:

|
|
Plasticine Projections


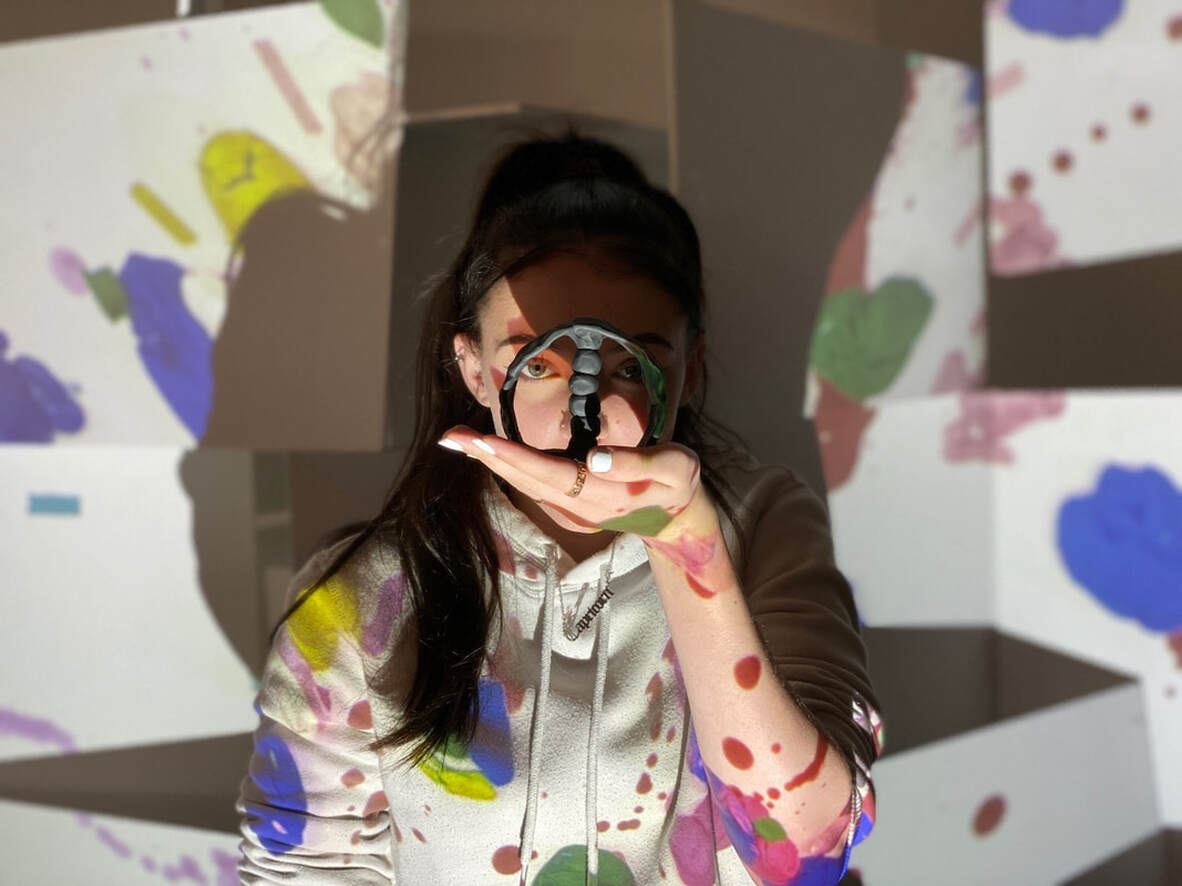
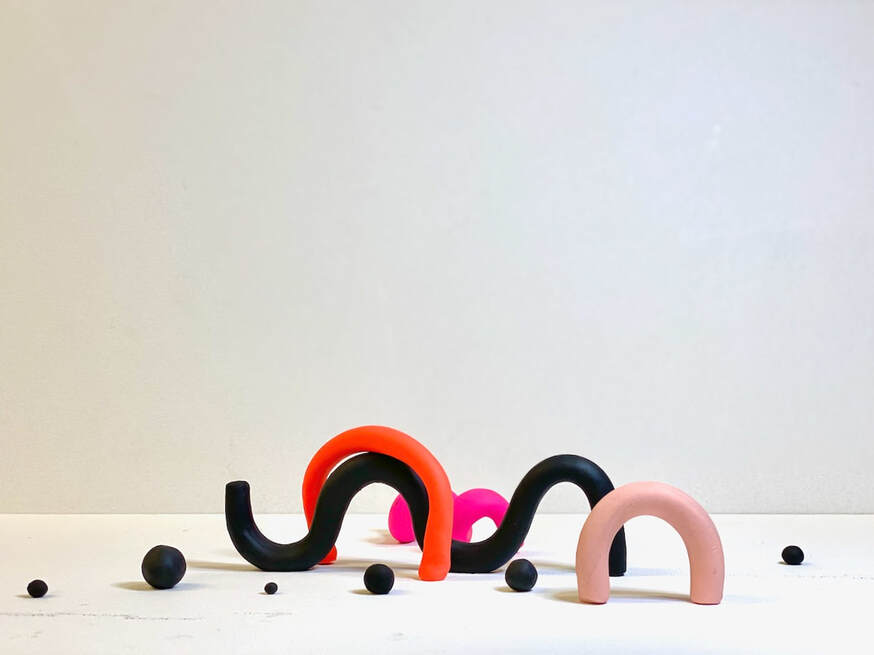
creating the final product...
For the making day I decided to go for a theme of neon colours with a mixture of different textures, so going off of this idea i thought it would be a good idea to use brightly coloured candles and use that as a starting base. To start off I lit my candles and while I was waiting for them to melt down, I used cubes of waxed and manually melted them down onto my canvas so that they were slightly raised creating the desired texture. Once they had dried I grab my burning candles and poured the melted wax randomly over the canvas making sure that I missed the mounds of wax I had created before hand. Once I waited for the fresh wax to dried I added some small strips of tape that I had that were also brightly coloured and stuck them down randomly however still making sure they were evened out. Once that was finished I then decided to use the plasticine that i had used in earlier projects and once again randomly placed then on top of my canvas. When I decided I was happy with how they were placed I photographed it. After this I decided that I wanted to use the projector, I connected the laptop to the projector to then project the image onto a white wall. To also create more of a textured image I decided to put large white cubes and boards on stands that were around the class in-front of my original projection to create loads of visual screens, to therefore add texture and make the image more abstract and more interesting to look at. Once I had photographed this product I saw a gap in the board where I thought a sculpture made from plasticine would look great, so I therefore proceeded to make a black sculpture to fill the gap. When I had finished creating the sculpture I placed it in the gap and photographed that.
